
微信支付官方文档:https://pay.weixin.qq.com/wiki/doc/apiv3/wxpay/pages/api.shtml
下图是微信支付的一个流程图:

我们需要做的是:
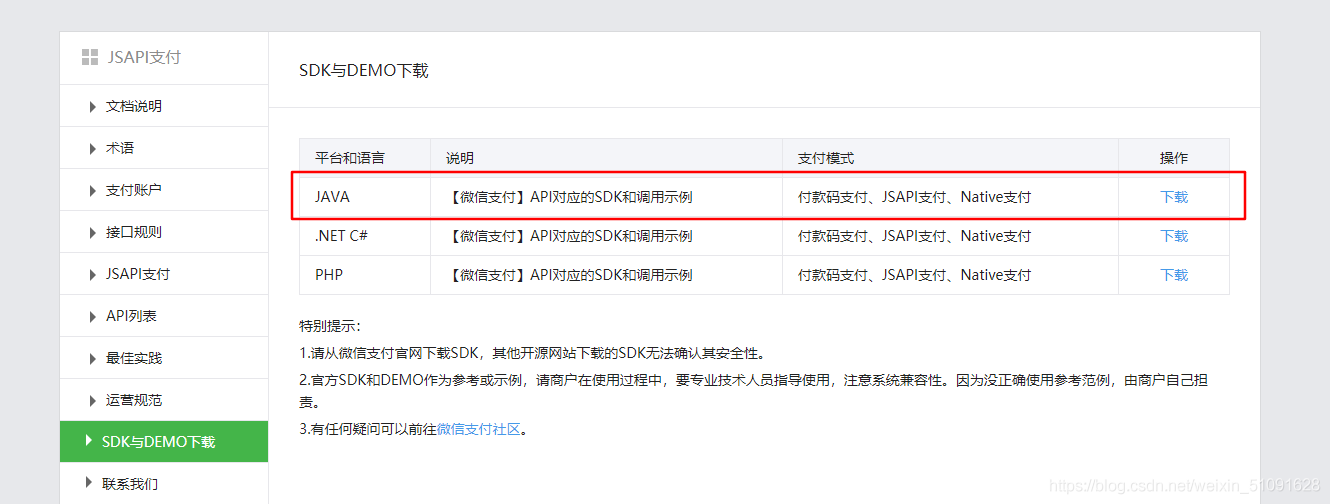
微信没有提供maven仓库坐标,因此我们必须下载使用。下载链接https://pay.weixin.qq.com/wiki/doc/api/jsapi.php?chapter=11_1
微信SDK提供了一个统一的微信支付工具类:WXPay:
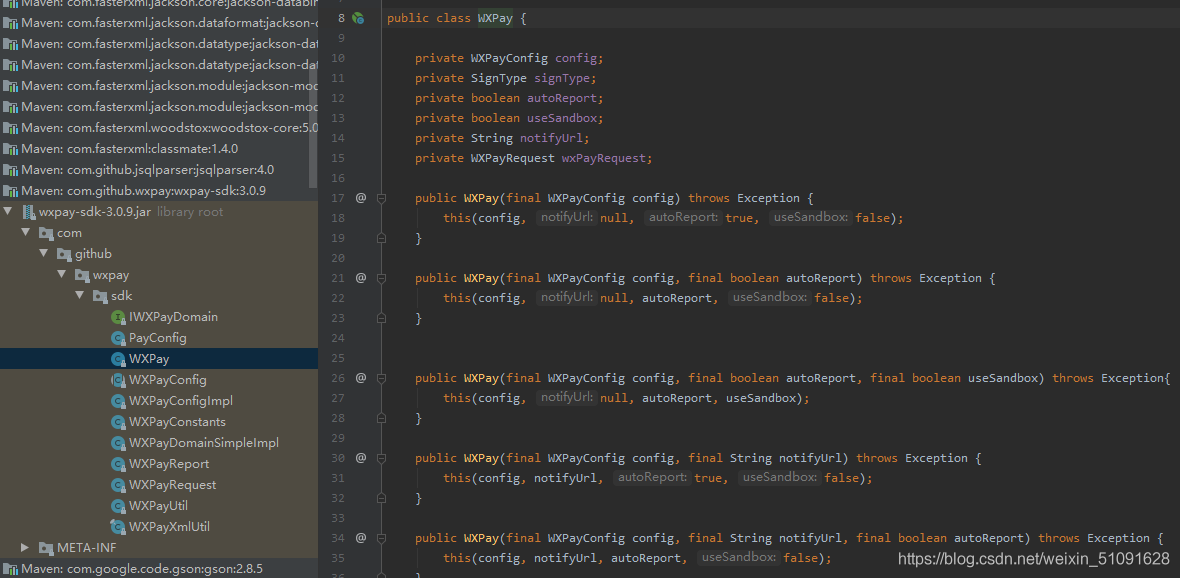
我们主要关注其中的unifiedOrder方法,统一下单:
/**      * 作用:统一下单
      * 场景:公共号支付、扫码支付、APP支付      * @param reqData 向wxpay post的请求数据      * @return API返回数据      * @throws Exception      */ public Map unifiedOrder(Map reqData) throws Exception {     return this.unifiedOrder(reqData, config.getHttpConnectTimeoutMs(), this.config.getHttpReadTimeoutMs()); }
这里的请求参数是:Map
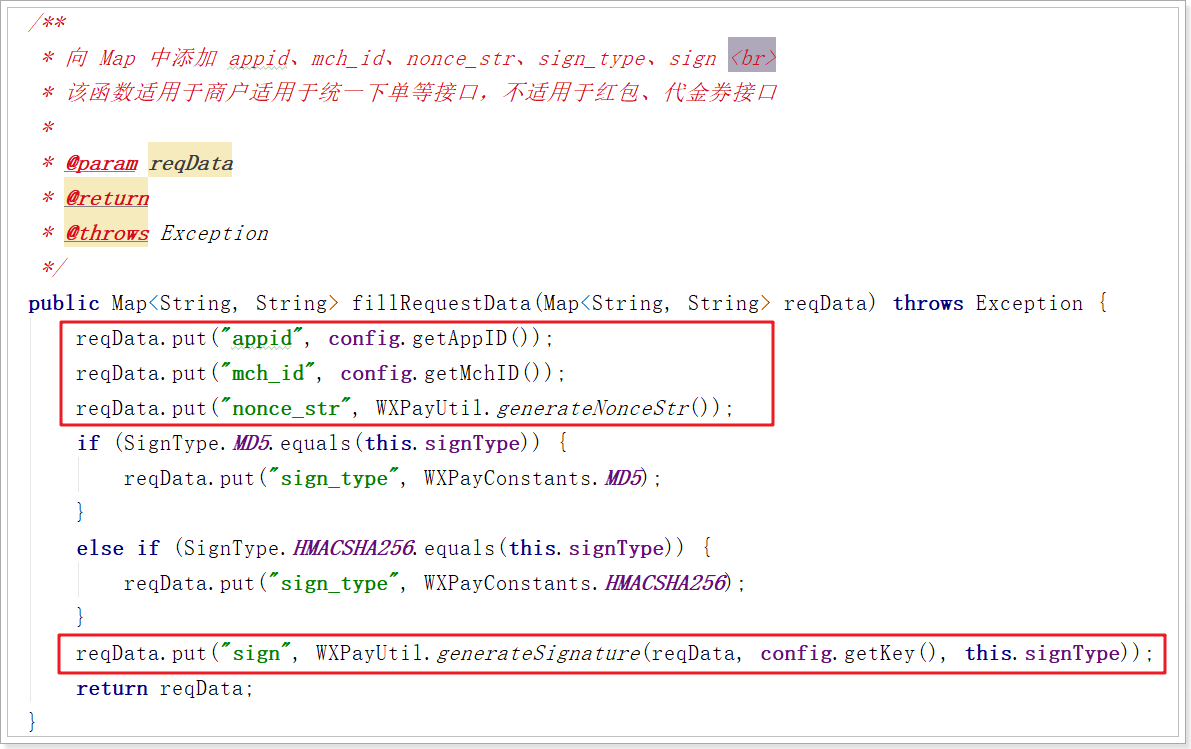
剩下的:appid、mch_id、nonce_str、sign_type和sign参数都有WXPay对象帮我们设置,那么问题来了:这些参数数据WXPay是怎么拿到的呢?
其中,
也就是说,这例需要配置的包括:appid、mch_id、密钥key。这些从哪里来呢?
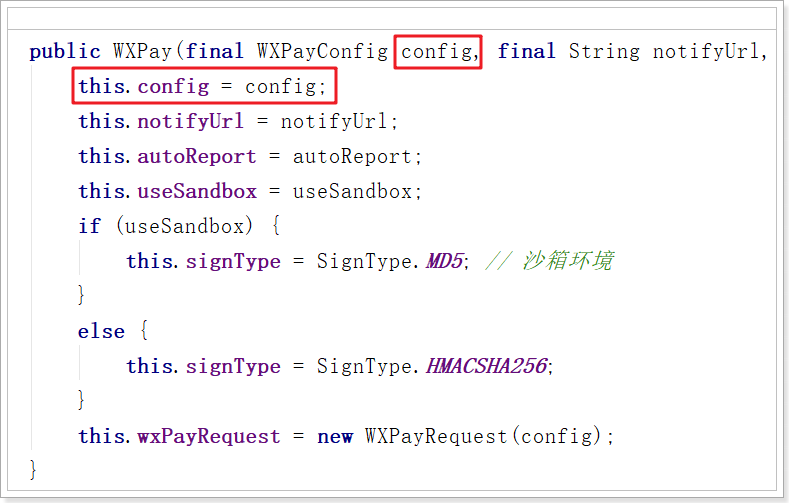
看下WXPay的构造函数:
public WXPay(final WXPayConfig config) throws Exception { this(config, null, true, false); }这里需要一个WXPayConfig对象,显然是配置对象。
WXPay依赖于WXPayConfig进行配置,那么WXPayConfig是什么呢?
看下源码中的关键部分:
public abstract class WXPayConfig { /** * 获取 App ID * * @return App ID */ abstract String getAppID(); /** * 获取 Mch ID * * @return Mch ID */ abstract String getMchID(); /** * 获取 API 密钥 * * @return API密钥 */ abstract String getKey(); // 。。。省略 }这不就是WXPay中需要配置的3个属性嘛,当我们实现这个类,并且给出其中的值,把WXPayConfig传递给WXPay时,WXPay就会获取到这些数据:
当我们利用WXPay发送请求时,WXPay就会帮我们封装到请求参数中:
而在我提供给大家的SDK中,就编写了一个WXPayConfig的实现:
package com.github.wxpay.sdk; import lombok.Data; import java.io.InputStream; /** * @author 黑马程序员 */ @Data public class WXPayConfigImpl extends WXPayConfig { /** * 公众账号ID */ private String appID; /** * 商户号 */ private String mchID; /** * 生成签名的密钥 */ private String key; /** * 支付回调地址 */ private String notifyUrl; /** * 支付方式 */ private String payType; public InputStream getCertStream(){ return null; } public IWXPayDomain getWXPayDomain(){ return WXPayDomainSimpleImpl.instance(); } }将来我们只需要new出这个实现类对象,并且给这3个参数赋值即可。
首先,把下载的SDK打包并安装到本地的maven仓库,方便在项目中使用。
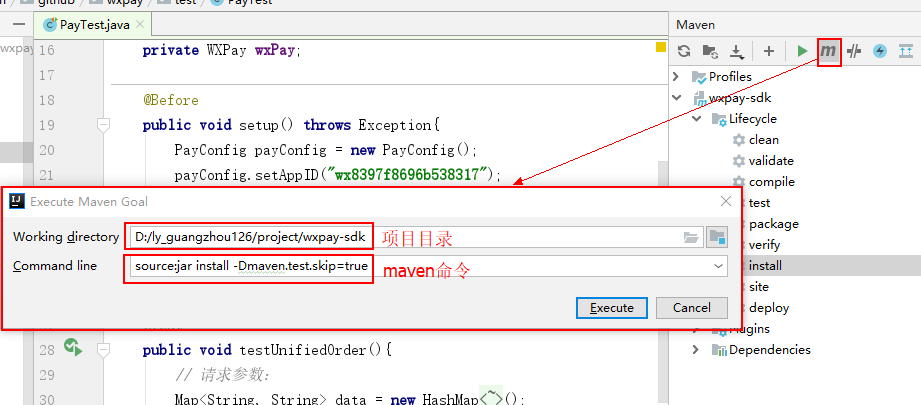
直接对SDK进行打包,在项目maven中执行如下命令:
mvn source:jar install -Dmaven.test.skip=true如图所示:
打包完成后
引入依赖(除了wxpay的依赖,还需要一个转换xml的依赖)
com.github.wxpay wxpay-sdk 3.0.9 com.fasterxml.jackson.dataformat jackson-dataformat-xml 在yml中配置 (如果服务运行在本地,那么回调接口就无法回调成功,需要使用内网穿透工具)
#微信APP支付参数 pay: wx: #商户应用appId appId: #设备号 mchId: #商户key:api秘钥(32位) key: #回调接口 notifyUrl: http://服务ip:port/wx/notify #支付类型(扫码) payType: NATIVEVE将这些属性注入到PayProperties中:
import lombok.Data; import org.springframework.boot.context.properties.ConfigurationProperties; import org.springframework.stereotype.Component; @Data @Component @ConfigurationProperties(prefix = "pay.wx") public class PayProperties { private String appId; private String mchId; private String key; private String notifyUrl; private String payType; }配置微信支付所需要的对象注入到spring容器中:
import com.github.wxpay.sdk.PayConfig; import com.github.wxpay.sdk.WXPay; import org.springframework.beans.factory.annotation.Autowired; import org.springframework.context.annotation.Bean; import org.springframework.context.annotation.Configuration; /** * 初始化微信支付需要的对象 */ @Configuration public class PayConfiguration { @Autowired private PayProperties payProps; @Bean public WXPay wxPay() throws Exception { PayConfig payConfig = new PayConfig(); payConfig.setAppID(payProps.getAppId()); payConfig.setMchID(payProps.getMchId()); payConfig.setKey(payProps.getKey()); return new WXPay(payConfig); } }封装支付工具类
import com.github.wxpay.sdk.WXPay; import com.zhiwan.exception.ZwException; import lombok.extern.slf4j.Slf4j; import org.springframework.beans.factory.annotation.Autowired; import org.springframework.stereotype.Component; import java.util.HashMap; import java.util.Map; @Component @Slf4j public class PayHelper { @Autowired private WXPay wxPay; @Autowired private PayProperties payProps; /** * 生成支付链接 */ public String getPayUrl(String orderId,Long totalFee){ // 请求参数: Map data = new HashMap(); data.put("body", "乐优商城-商品订单支付"); data.put("out_trade_no", orderId.toString()); data.put("total_fee", totalFee.toString()); data.put("spbill_create_ip", "123.12.12.123"); data.put("notify_url", payProps.getNotifyUrl()); data.put("trade_type", payProps.getPayType()); // 此处指定为扫码支付 try { Map resp = wxPay.unifiedOrder(data); if(resp.get("return_code").equals("SUCCESS")&& resp.get("result_code").equals("SUCCESS")){ log.info("【微信支付】生成支付链接成功"); return resp.get("code_url"); }else{ log.error("【微信支付】生成支付链接失败,原因:"+resp.get("return_code")); throw new ZwException(500,"【微信支付】生成支付链接失败"); } } catch (Exception e) { e.printStackTrace(); throw new ZwException(500,"【微信支付】生成支付链接失败,"+e.getMessage()); } } } @RestController public class OrderController { @Autowired private OrderService orderService; /** * 生成支付链接 * */ @GetMapping("/order/url/{id}") public ResponseEntity buildPayUrl(@PathVariable("id") Long id){ String payUrl = orderService.buildPayUrl(id); return ResponseEntity.ok(payUrl); } } service代码:
可以设置支付链接的有效时间,可以使用redis缓存:
@Service @Slf4j @Transactional public class OrderService { /** * 生成微信支付链接 * * @param id * @return */ public String buildPayUrl(String id) { //1.先到redis取出当前订单的支付链接 String payUrl = redisTemplate.opsForValue().get("PAY_URL_" + id); //2.如果redis有,则直接取出订单的支付链接 if (StringUtils.isNotEmpty(payUrl)) { return payUrl; } //3.如果redis没有,则调用微信支付系统生成该订单的支付链接,把该链接存入redis,并设置有效期(2小时) //根据订单id查询订单(获取支付金额) //Order order = orderMapper.selectById(id); //生成支付链接,这里我们直接先设置1分钱 payUrl = payHelper.getPayUrl(id,1L); //把该链接存入redis,并设置有效期(2小时) redisTemplate.opsForValue().set("PAY_URL_" + id, payUrl, 2, TimeUnit.HOURS); return payUrl; } }页面响应结果:
使用qrious.js将该链接转成二维码

支付成功后微信会回调一个请求(回调的接口notifyUrl指定)
controller:
/** * 微信支付回调方法 * 接受的参数是xml类型 */ @PostMapping(value = "/wx/notify", produces = "application/xml") public Map wxNotify(@RequestBody Map paramMap) { orderService.wxNotify(paramMap); log.warn("【回调的信息:】"+paramMap.toString()); //返回成功信息给微信支付 Map resultMap = new HashMap<>(); resultMap.put("return_code", "SUCCESS"); resultMap.put("return_msg", "OK"); return resultMap; } service
/** * 微信支付回调 * * @param paramMap */ public void wxNotify(Map paramMap) { //1.订单ID String orderId = (String) paramMap.get("out_trade_no"); //2.支付金额 Long totalFee = Long.valueOf((String) paramMap.get("total_fee")); //3.查询订单 Order order = orderMapper.selectById(orderId); log.warn("订单是:" + order.toString()); if (order == null) { throw new ZwException(500, "订单不存在"); } if (order.getActualFee() != totalFee) { throw new ZwException(500, "订单金额不正确"); } //修改订单状态 try { order.setStatus(OrderStatusEnum.PAY_UP.value()); /** * 微信支付1 */ order.setPaymentType(1); order.setPayTime(new Date()); QueryWrapper query = Wrappers.query(); query.eq("order_id", orderId); orderMapper.update(order, query); log.info("【微信通知】更新订单状态成功"); } catch (Exception e) { e.printStackTrace(); log.error("【微信通知】更新订单状态失败"); throw new ZwException(500, "更新订单状态失败"); } }